Campaigns \ Emails
The Emails page allows you to set up automated emails triggered by specific actions within your campaign. The creation flow is as follows:
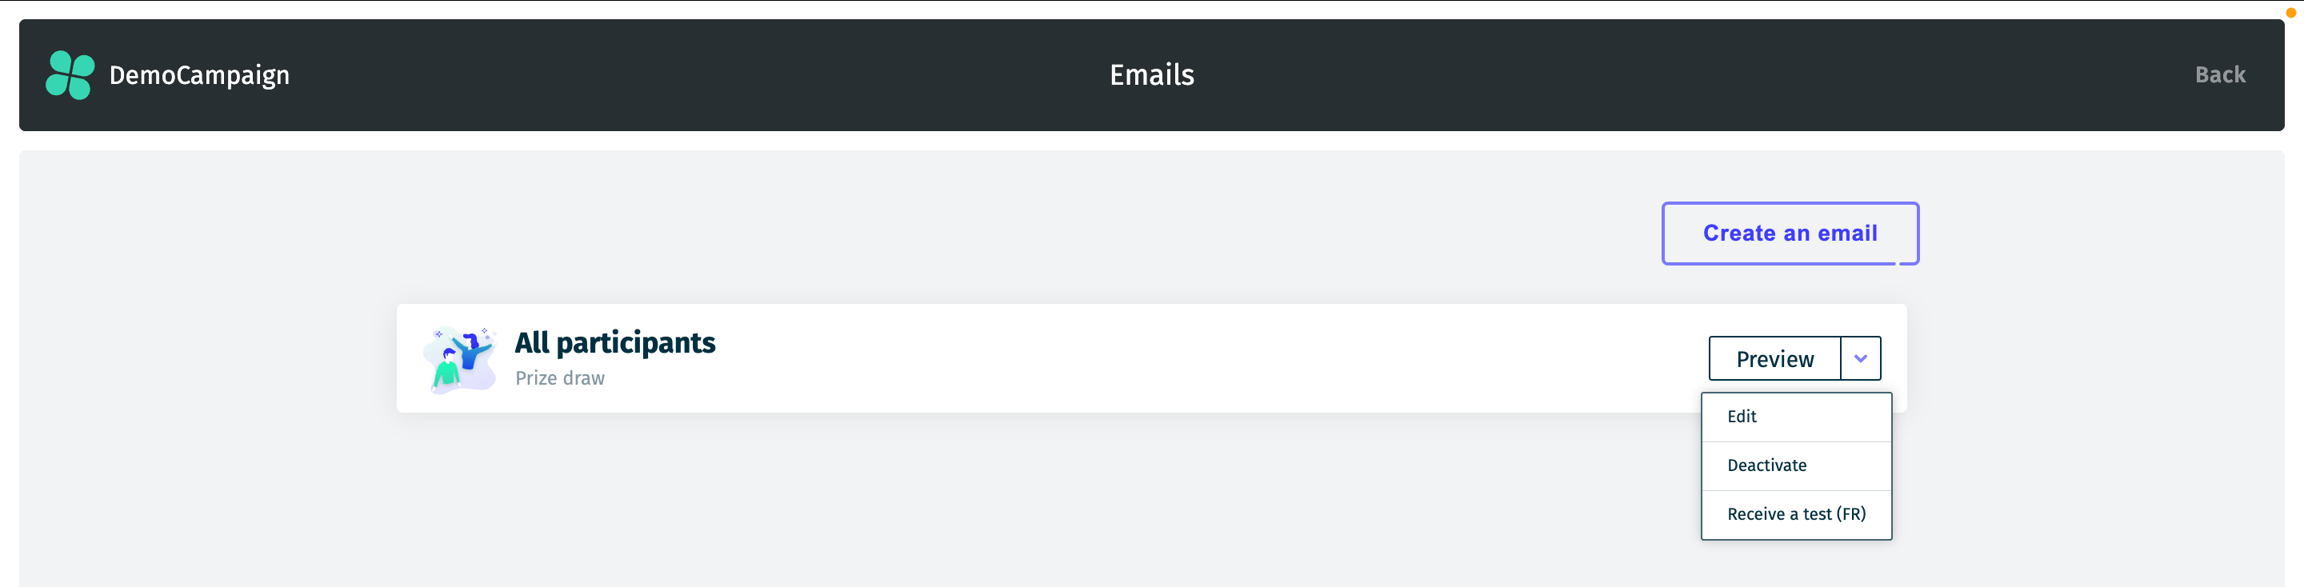
Click on the Create an email button.

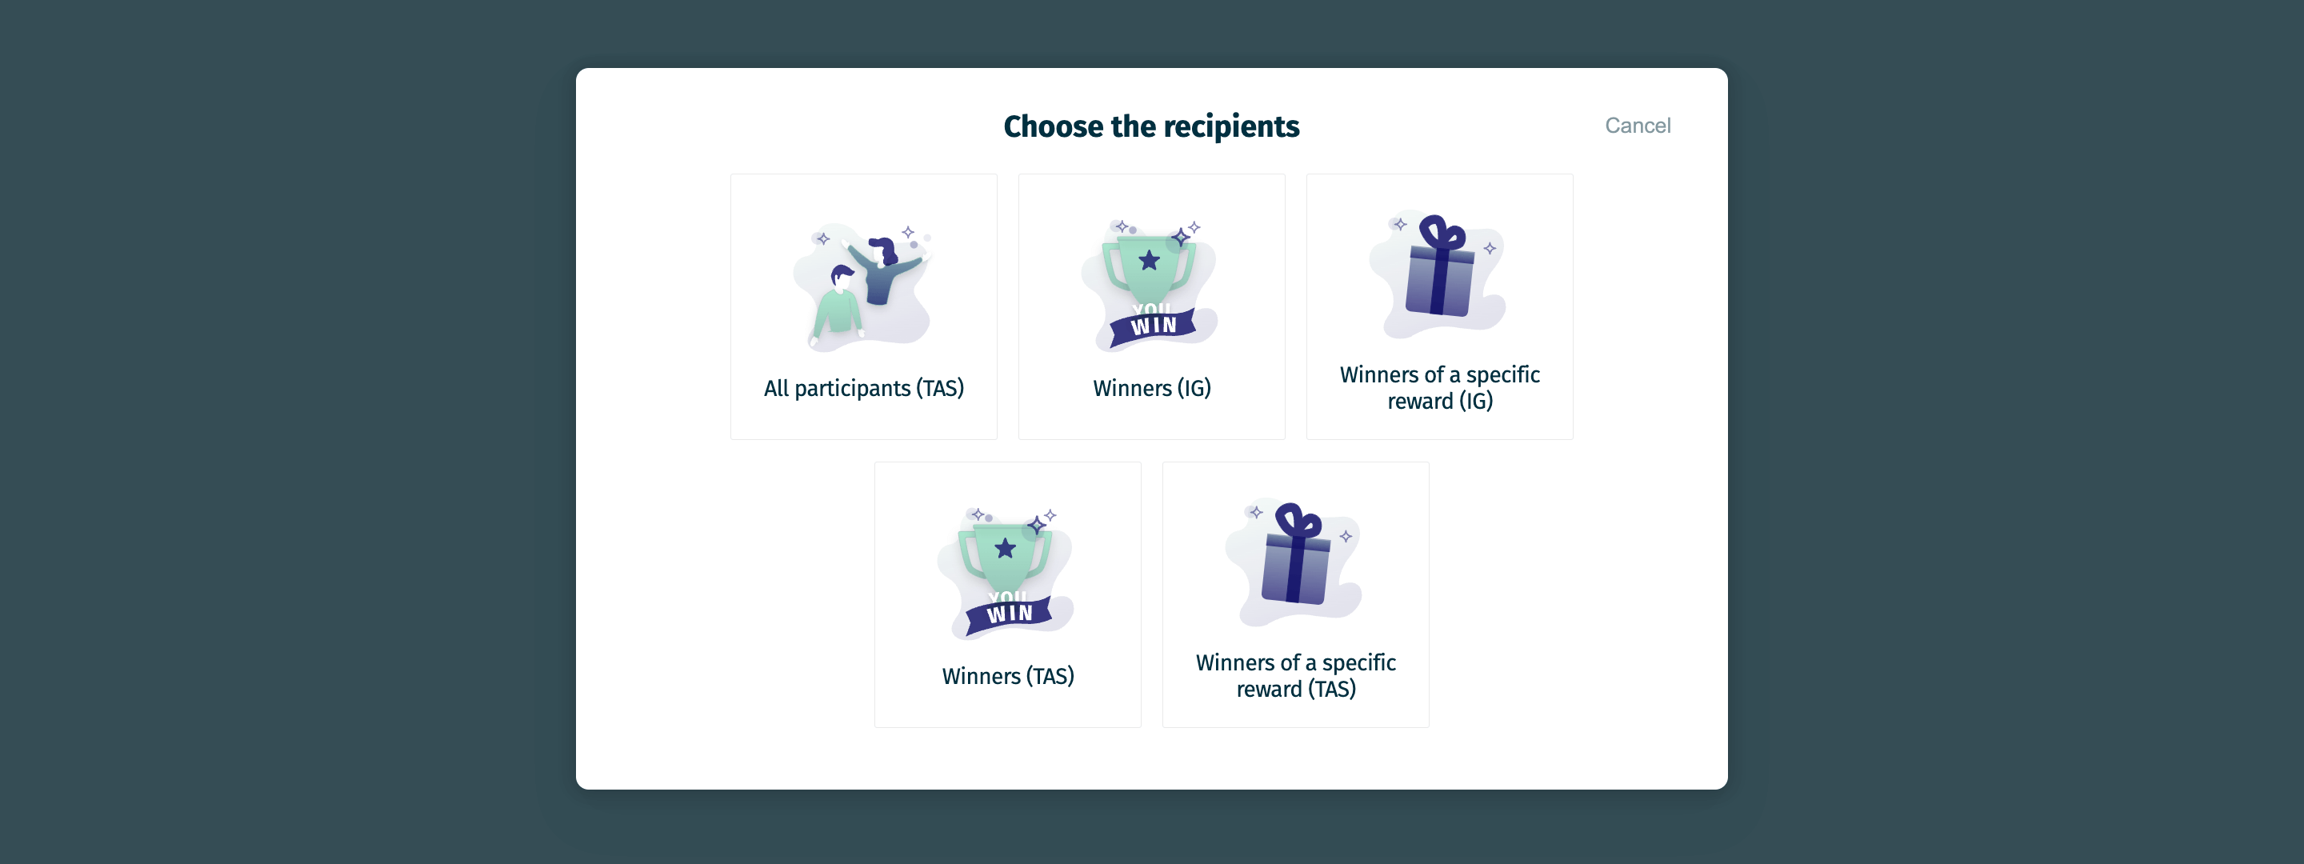
Choose the trigger.
The available triggers may vary depending on your selected mechanic, but the five options are:
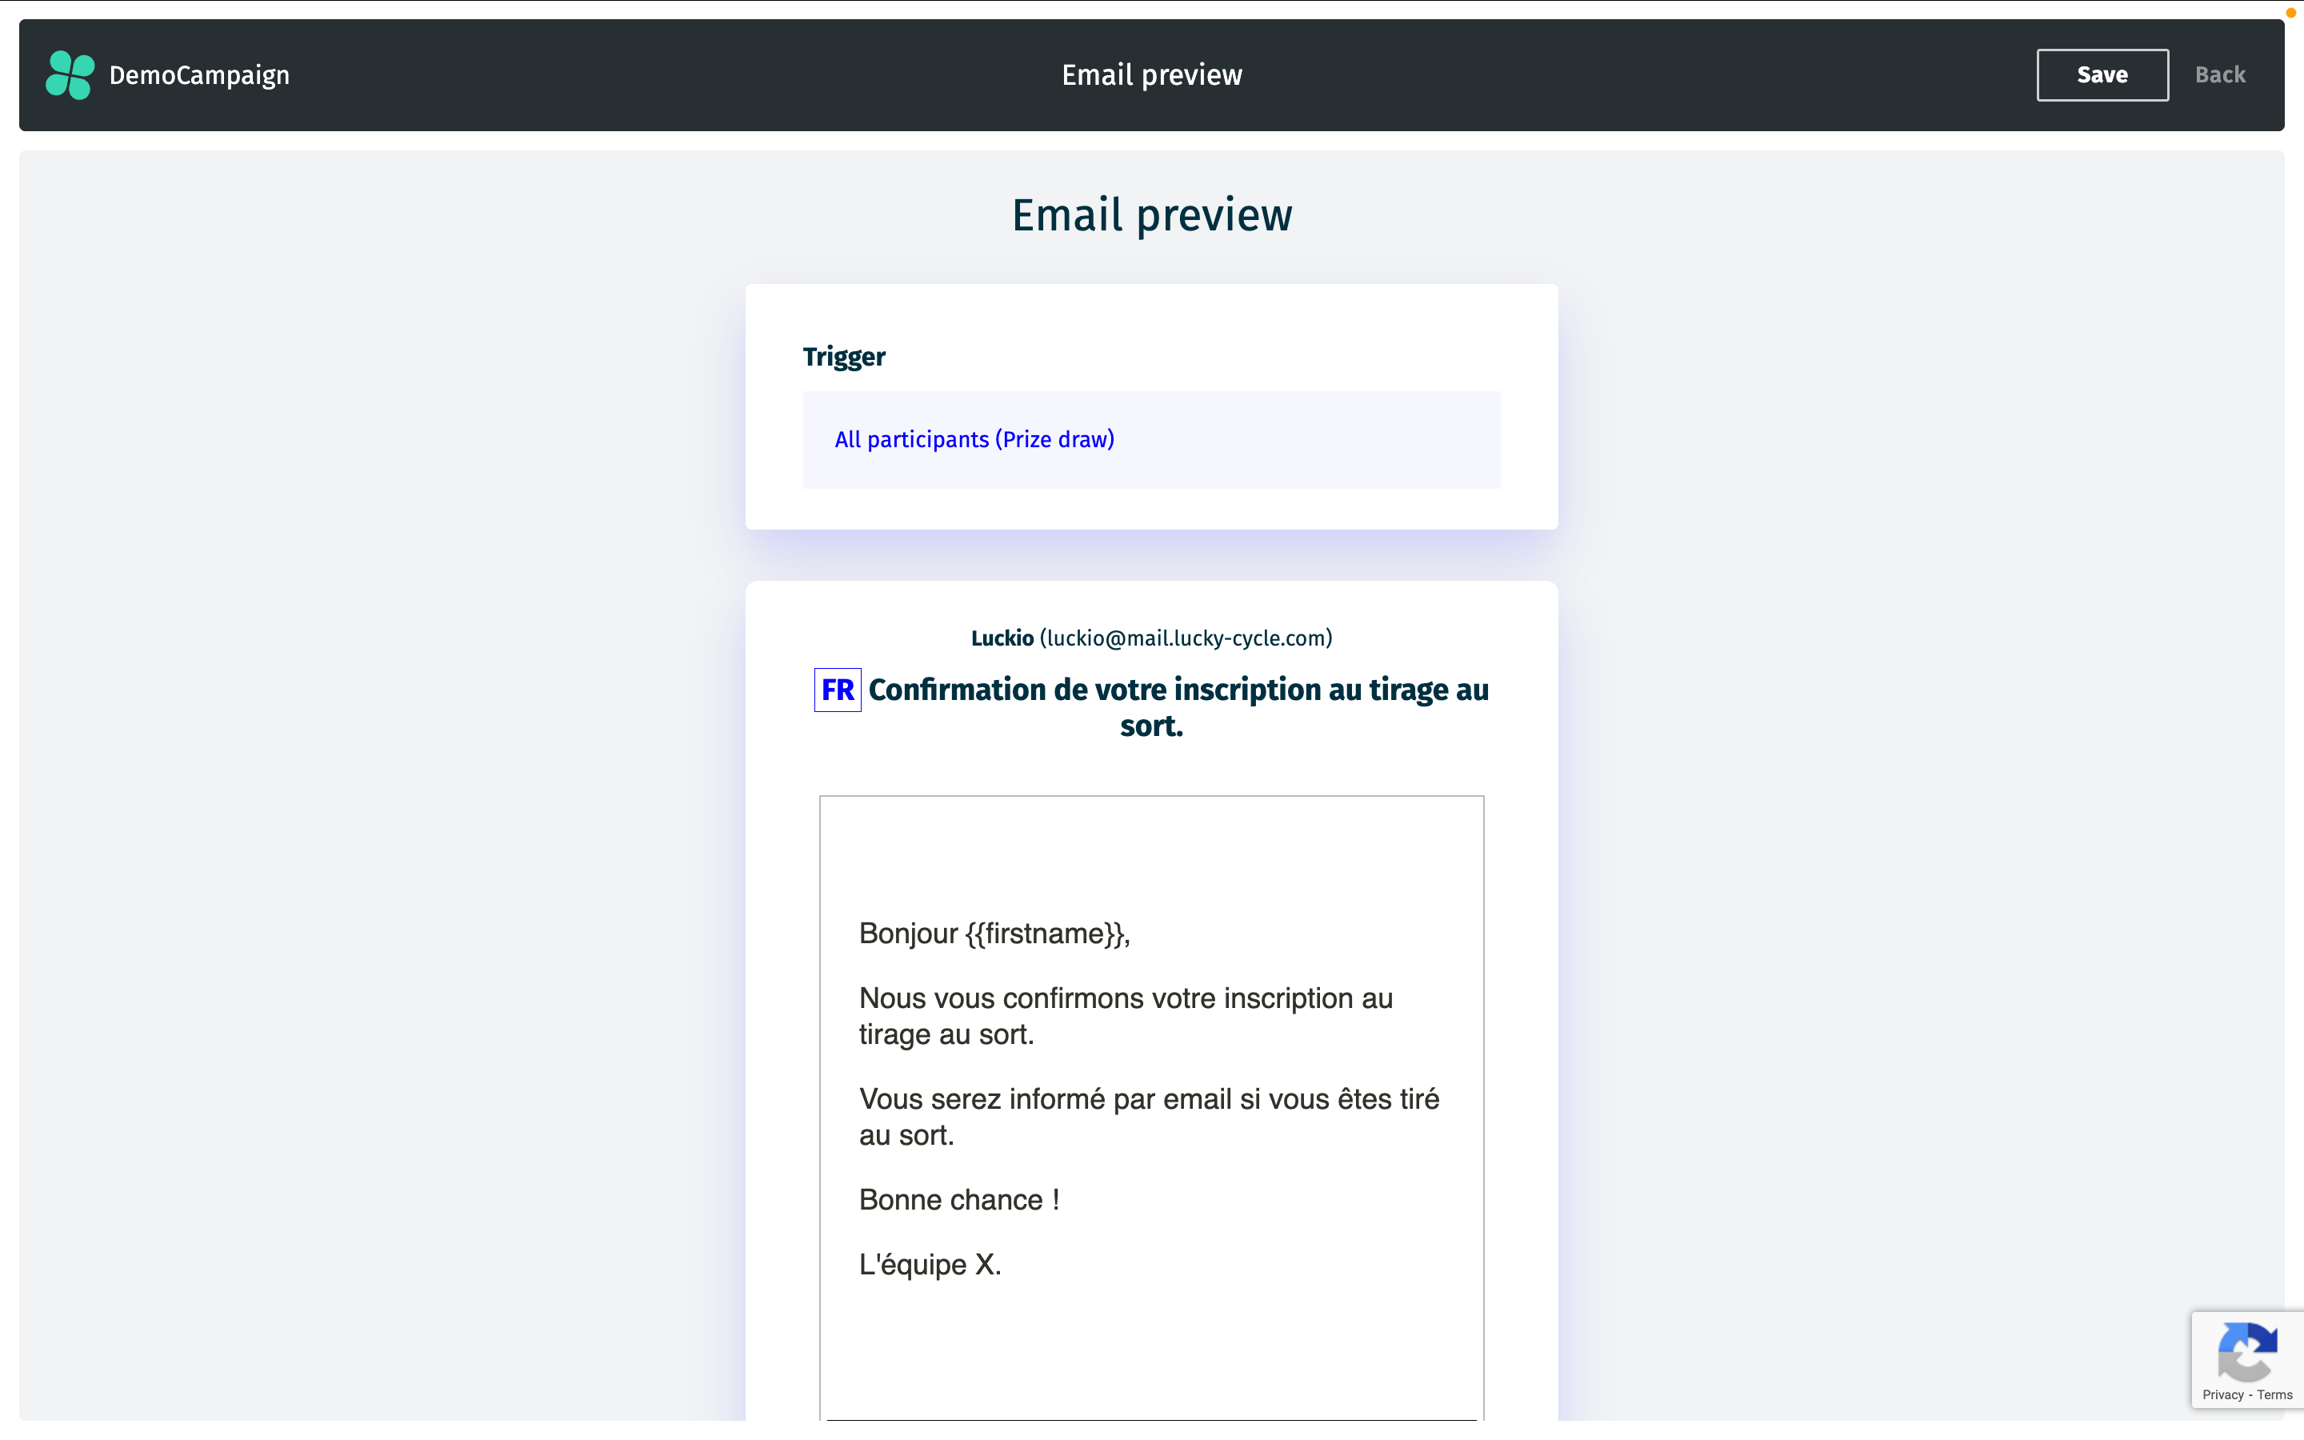
All participants (prize draw)
Winners (all rewards - instant win)
Winners of a specific reward (instant win)
Winners (prize draw)
Winners of a specific reward (prize draw)
Select whether to use our default template (A), which you can edit, or import your own (B).
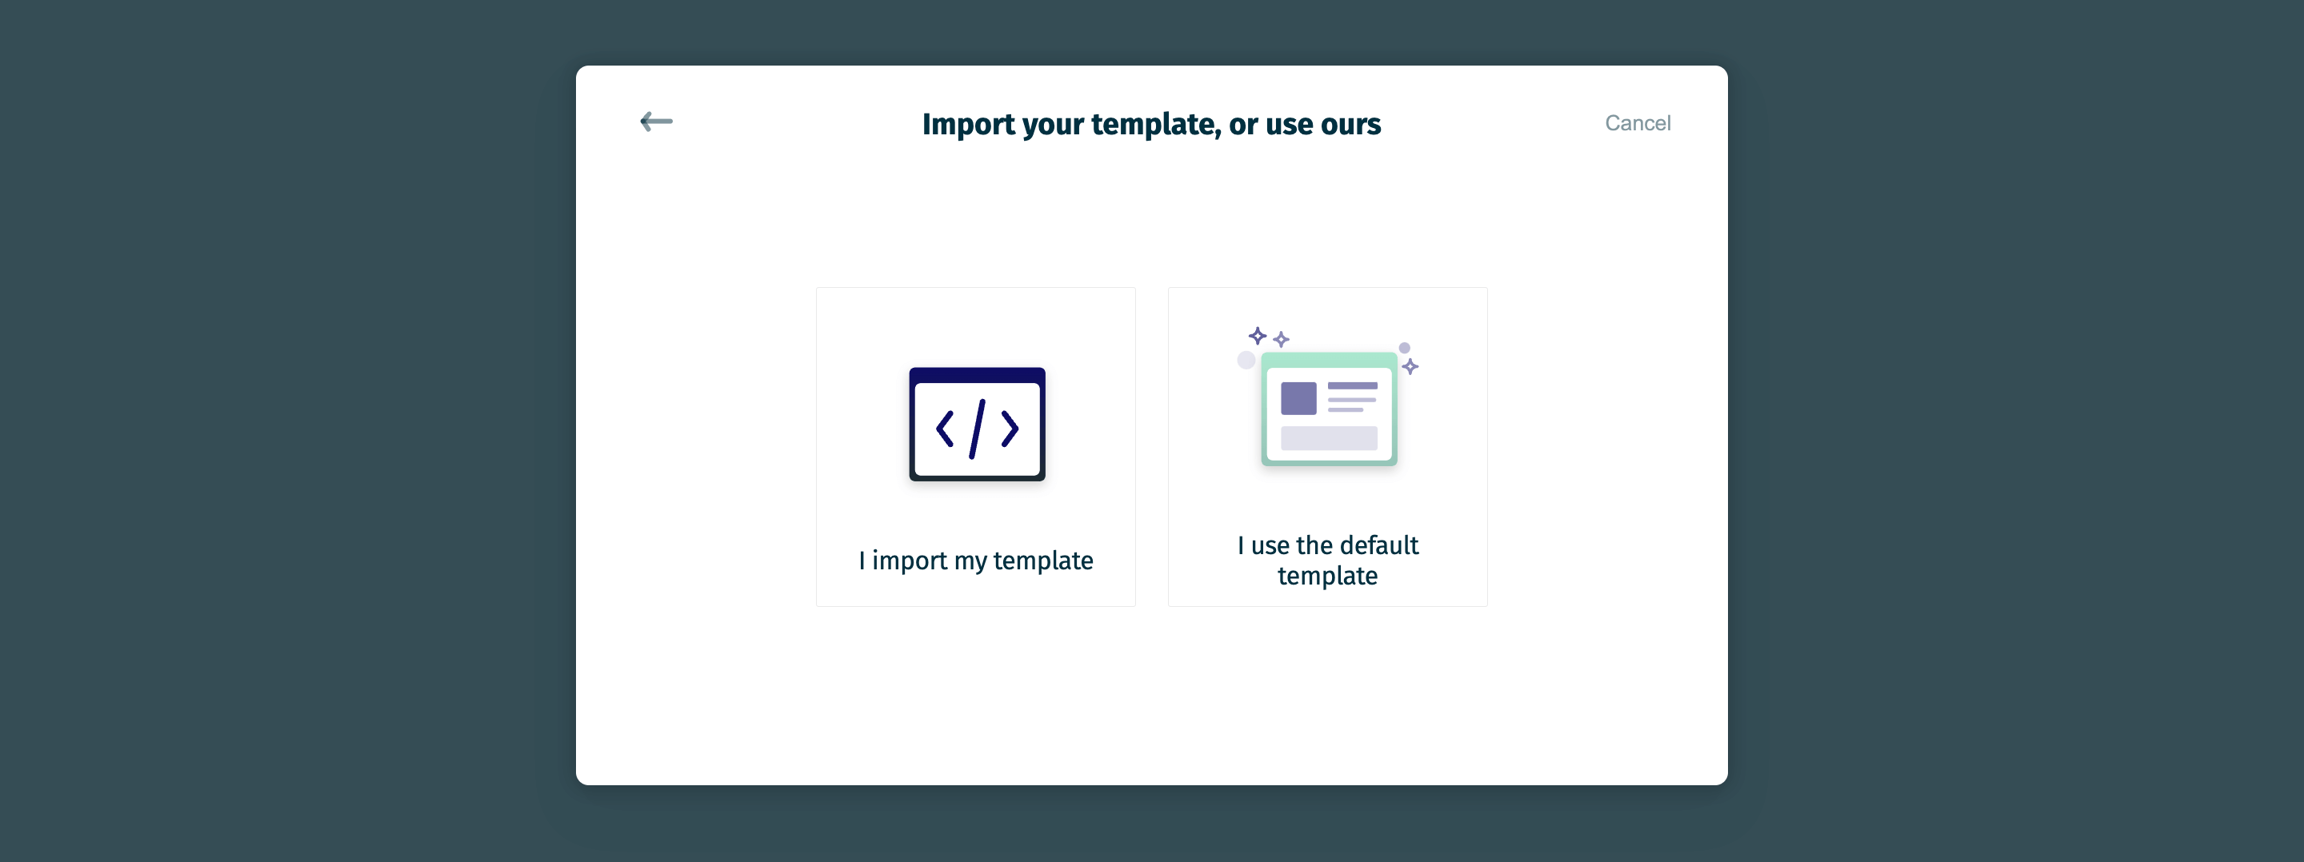
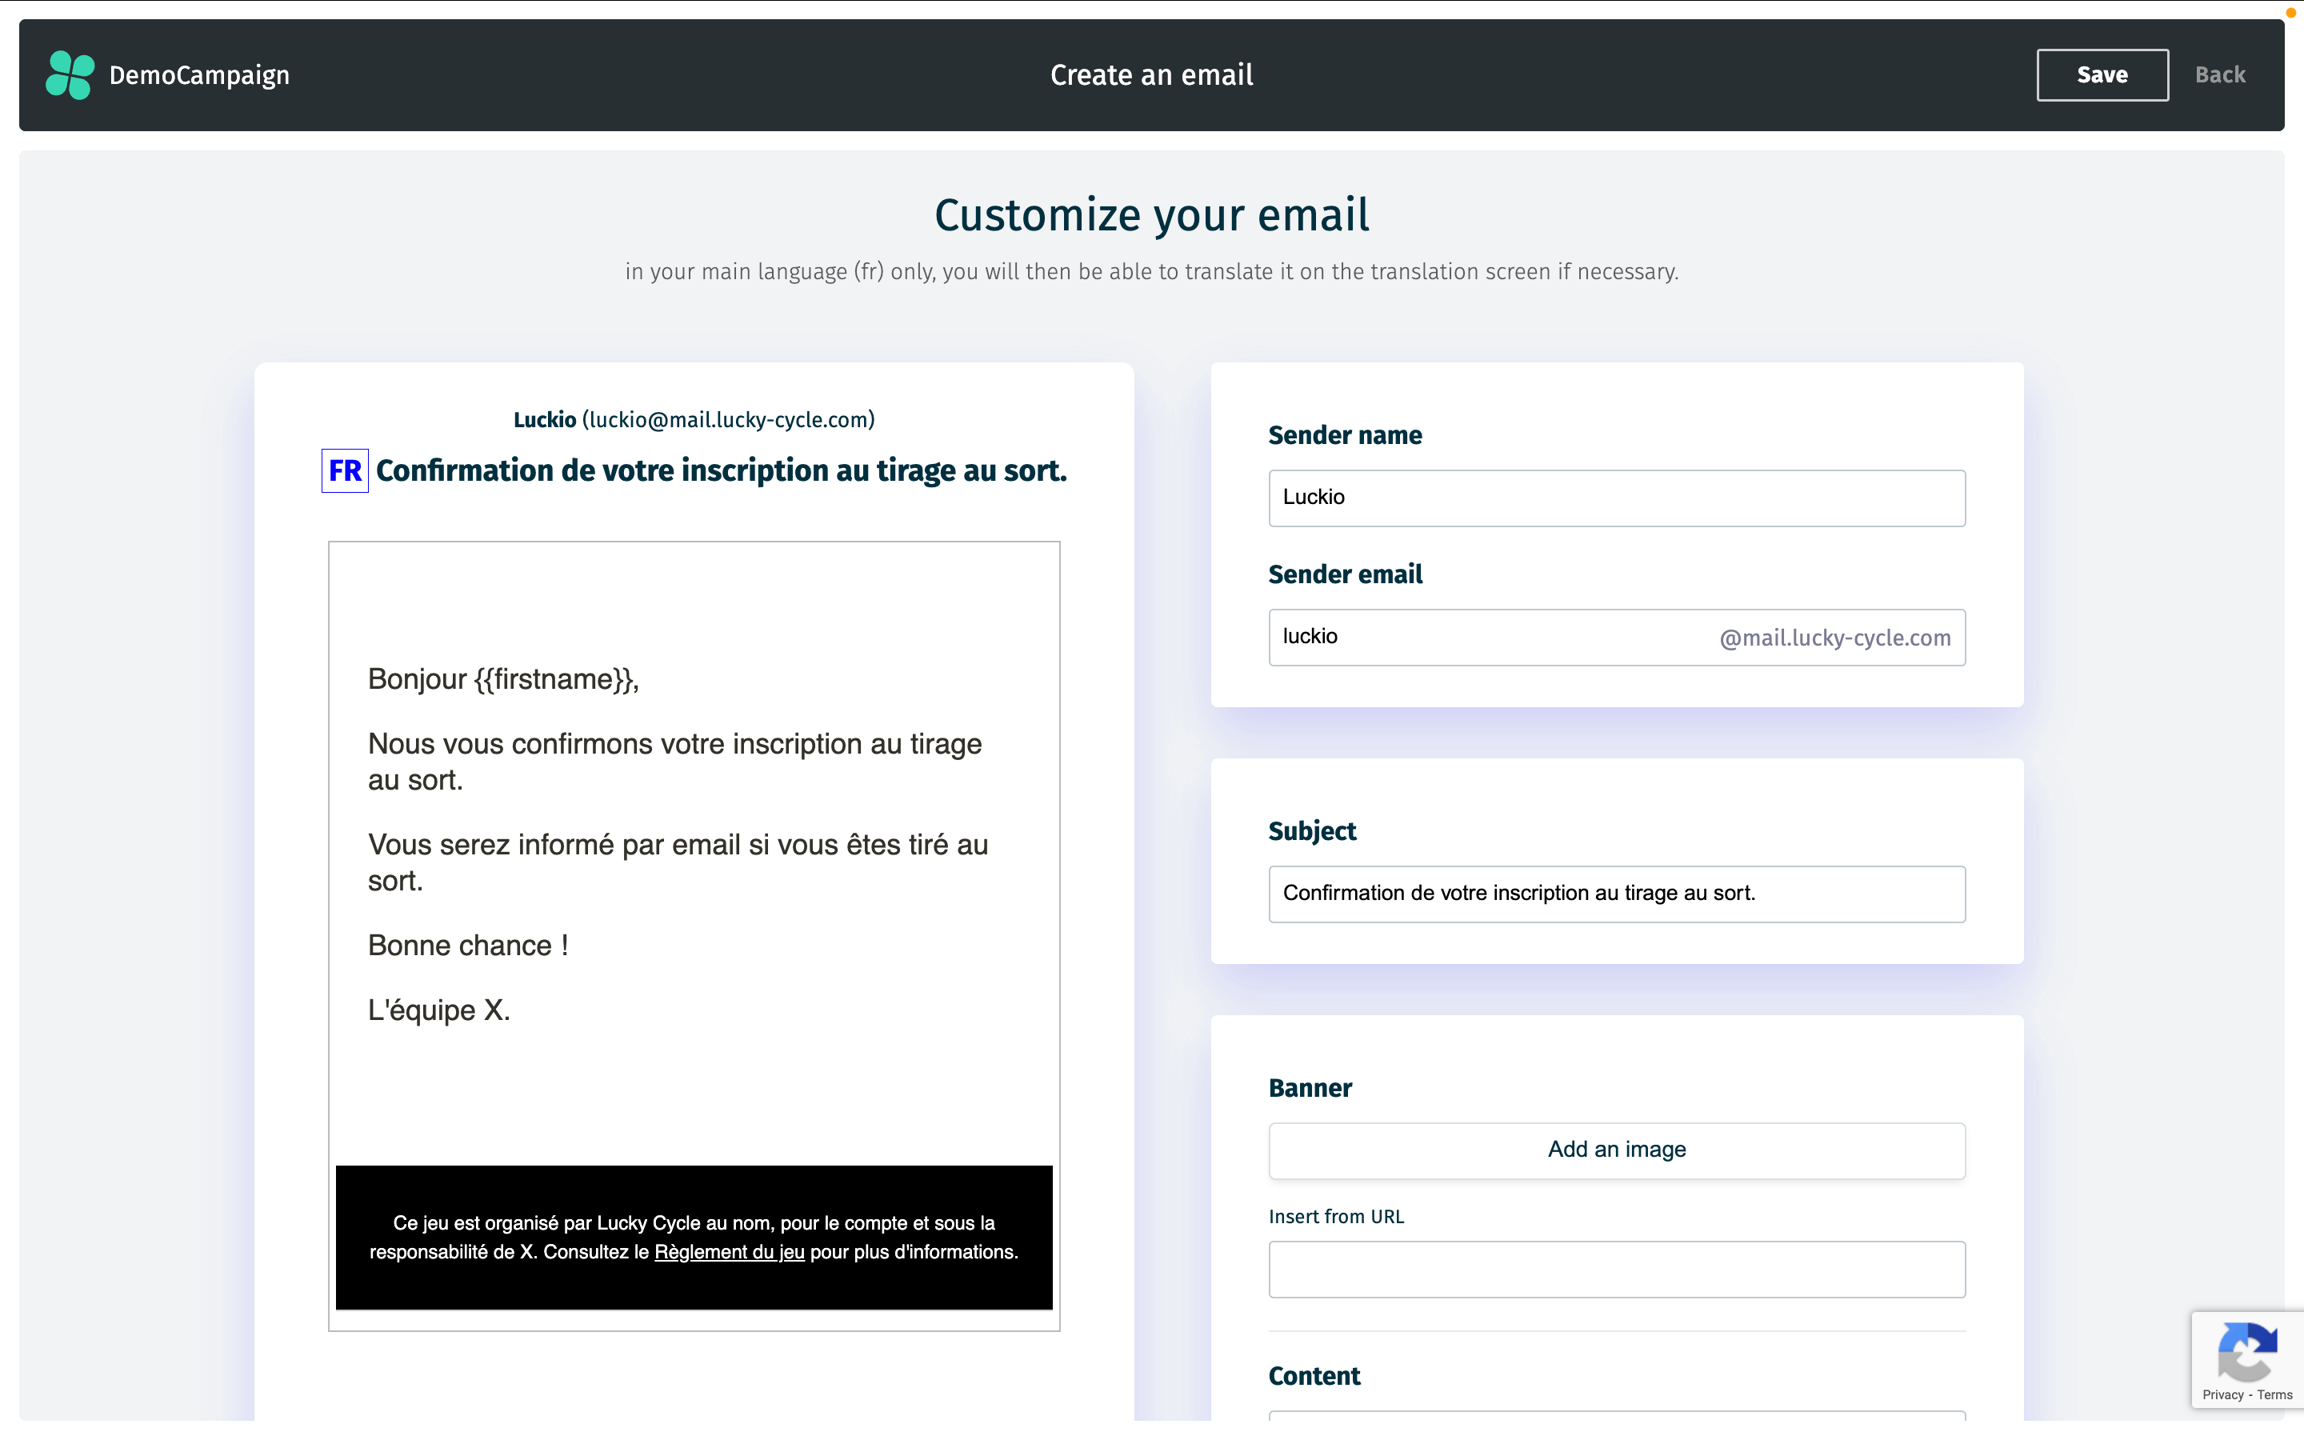
3A. If you choose to use our default template, you can customize:
Sender name
Sender email
Subject
Banner
Content
Image
Footer
Content
Text color
Background color
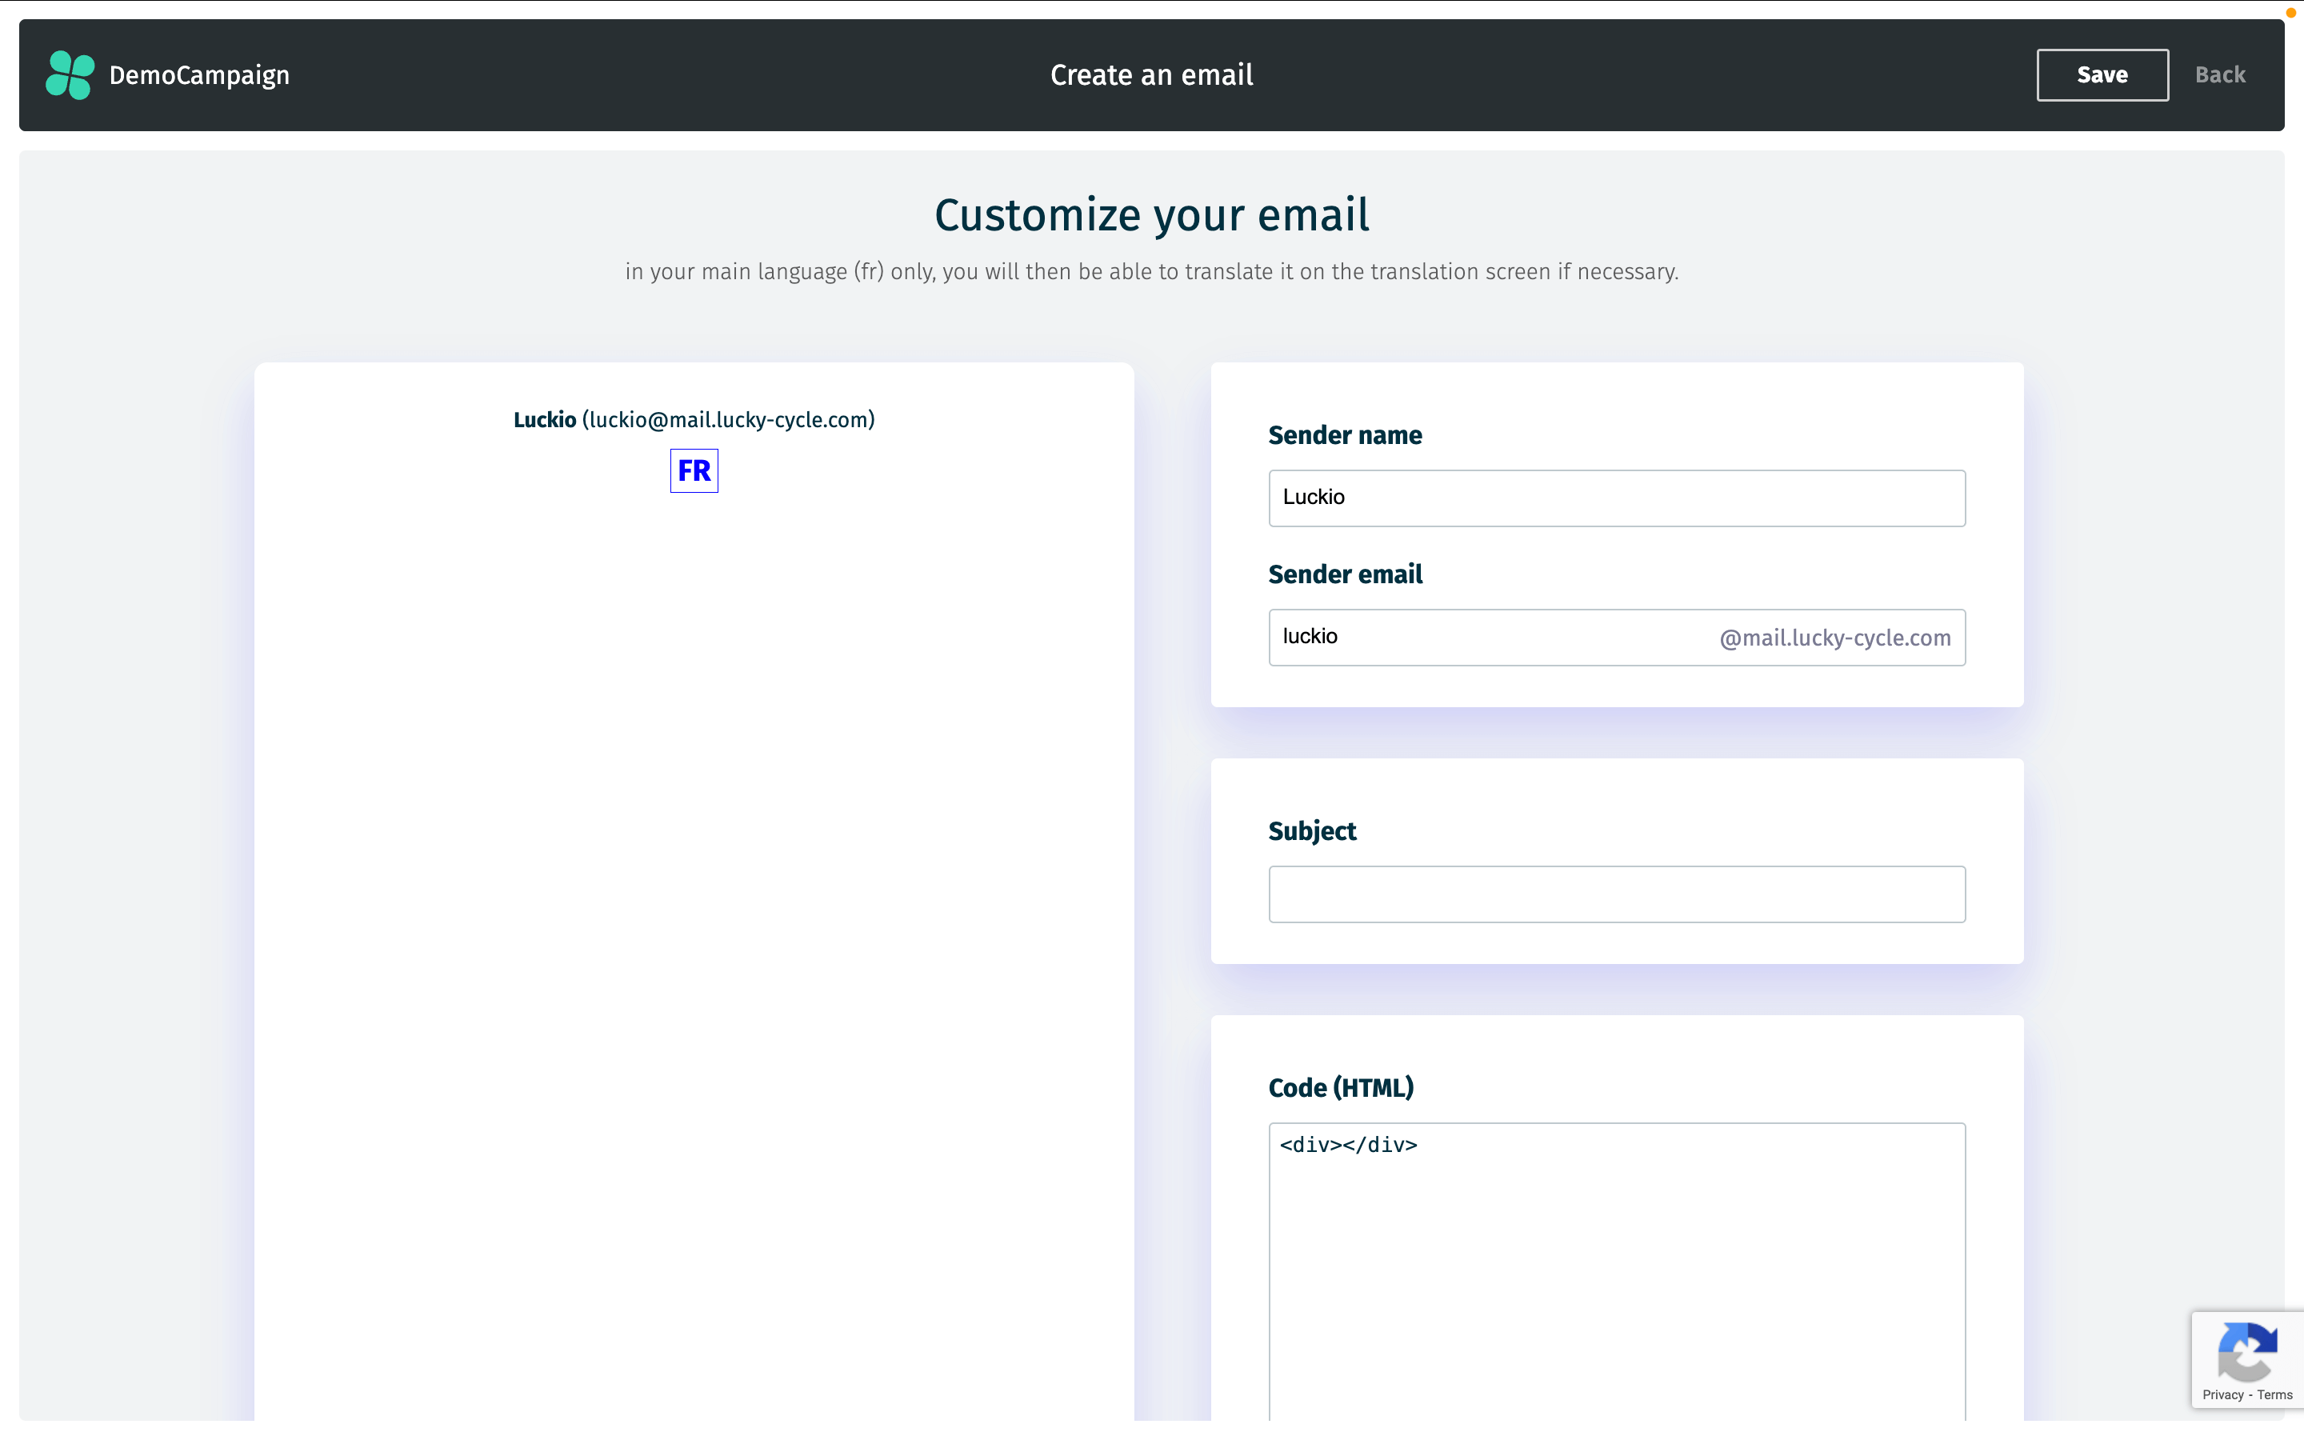
3B. If you choose to use your own template, you can specify:
Sender name
Sender email
Subject
Email content (in HTML)
In both cases, you can use variables in the email content (availability depends on the data collected in the campaign; see the Screens section for more information).
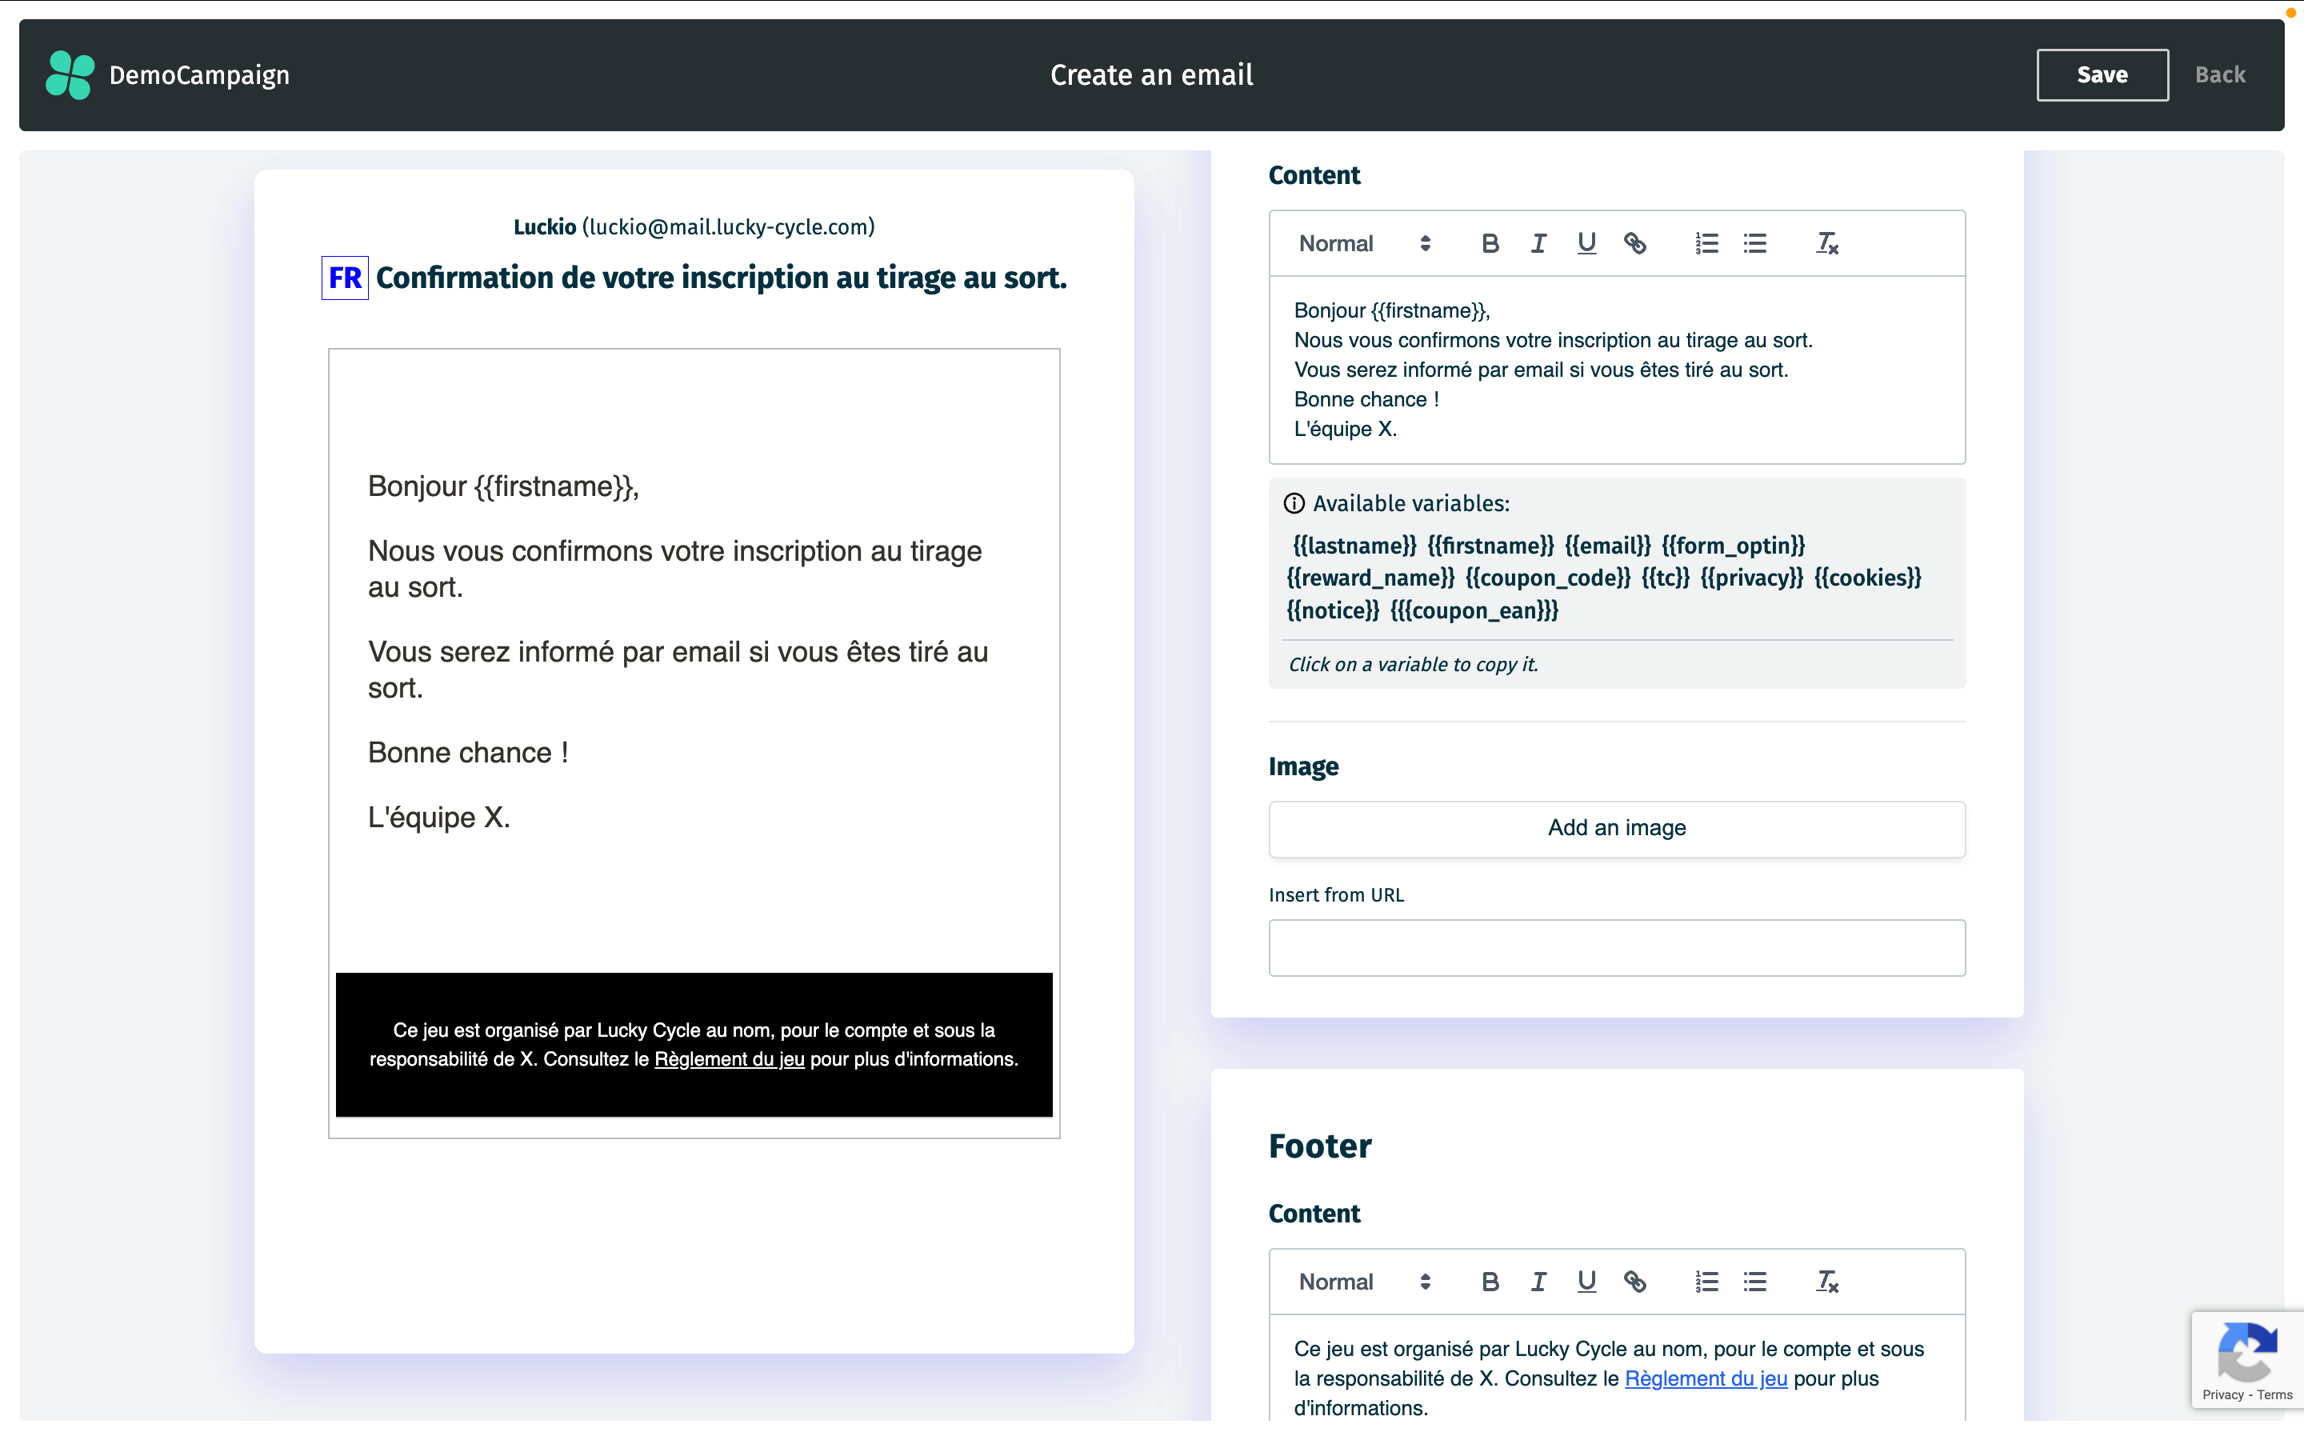
For example, you can use variables like
{{firstname}}, which is here collected in the form, allowing you to write personalized emails such as "Hello {{firstname}},".
Once an email is created, you can:
Preview: See how the email will look before sending.
Edit: Make any changes to the email content, subject, or settings (excluding the trigger).
Activate/Deactivate: Enable or disable the email from being sent automatically.
Test: Send a test email to verify the setup before going live (sent to your account email address).
Last updated